Introduction
This guide goes through the stages necessary when installing and configuring enVigil FMS as a stand-alone system on a brand new Windows PC. In this guide we will use enVigil FMS 3.5 build 3, but this should also be very similar with previous and future versions.
Additional steps are needed for implementing an enVigil system with view-nodes and this will be covered in another guide.
PC Prerequisites
- The host OS should be Windows 7 32/64bit
- It must allow for a USB security key to be attached
- RAID 1 is recommended
Windows Install
This guide continues from when you have already installed Windows 7 onto a PC. If you have not done that already, you can follow our Workstation Configuration Guide to do this. When starting this guide you should be logged into your first user account (emsuser) who should be in the Administrators group.
PC Configuration
Setting up the Control Panel
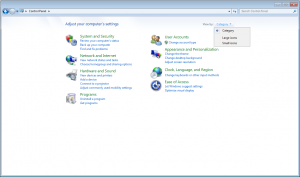
Open the Control Panel and ensure that “View by” is set to “Small icons”.
Removing unwanted applications
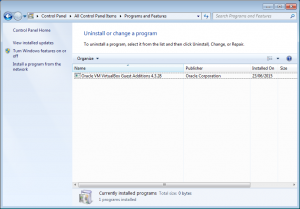
It is now necessary to remove undesirable applications such as trial versions of anti-virus and built-in applications such as Dell software (e.g. Dell OMCI must be removed). Use the Windows Control Panel .. Programs and Features to locate and uninstall these programs.
It is difficult to define the unwanted applications as the software installed on each PC is likely to change frequently. You should make a valued judgement as to whether the software is really needed. If you have any concerns or questions you should consult your IT department.
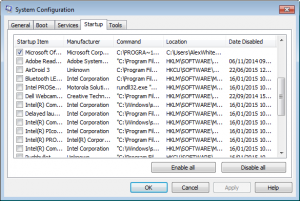
Ensure that any unwanted entries are also removed from the system startup. To run the system startup setup simply type “msconfig” in the start menus search bar and hit the enter key. Uncheck any unused applications.
Setting the resolution and blank screen saver
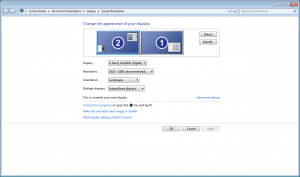
Right click the Desktop and select “Screen Resolution”. Adjust the slider control to set the screen resolution to at least 1280 x 1024.
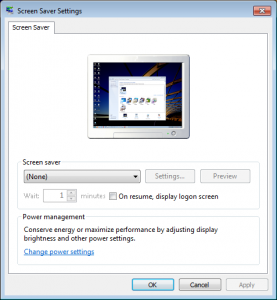
Right click the Desktop and select “Personalize”. Click the “Screen Saver” button located at the bottom right of the Personalization dialog box. Screen saver should be set to “Blank” with “On resume, display logon screen” unchecked.
Setting a basic theme
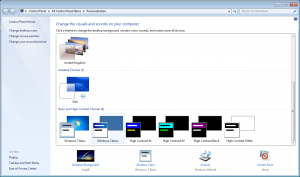
Right click the Desktop and select “Personalize”. Scroll down to “Basic and High Contrast Themes” and select “Windows Classic”.
Setting up the Logon screen
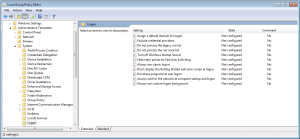
Run the “Local Group Policy Editor” by typing “gpedit.msc” in the start menus search bar. Under “Computer Configuration” .. “Administrative Templates” .. “System” .. “Logon” ensure “Hide entry points for Fast User Switching” and “Always use classic logon” settings are enabled.
Enabling the Administrator user and setting the password
By default the built-in Administrator account is hidden after Windows installation. It should be enabled and set up with a suitably secure password.
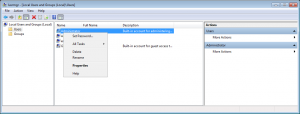
You can enable the Administrator account by typing “lusrmgr.msc” in the start menus search bar. Right click the “Administrator” user and click “Properties”. Ensure that “Account is disabled” is unchecked. Once enabled, you can change the password by right clicking the Administrator user again and click the “Set Password…” option.
Disabling the Windows Firewall
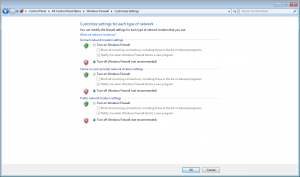
Disable the Windows Firewall by going to “Control Panel” .. “Windows Firewall” .. Click “Turn Windows Firewall on or off” .. Click “Turn off Windows Firewall” under each network location.
Disabling Windows Defender
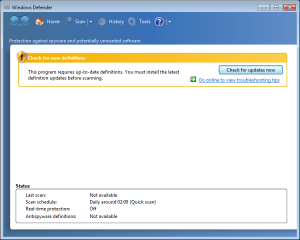
Disable Windows Defender by going to “Control Panel” .. “Windows Defender” .. “Tools” .. “Options” .. “Administrator” .. Ensure “Use this program” is unchecked and click the “Save” button.
Note – Windows Defender may not be able to be disabled until it has updated via the internet. If this is the case you should temporarily connect the PC to the internet to update Windows Defender. Once updated it can be disabled.
Disabling Security Alerts and Automatic Updates
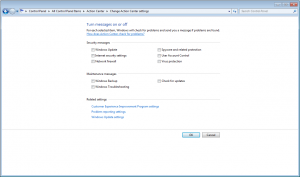
Disable Security Alerts by going to “Control Panel” .. “Action Center” .. “Change Action Center Settings” .. Ensure all check boxes are unchecked and click the “OK” button.
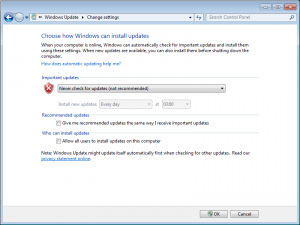
Disable Automatic Updates by going to “Control Panel” .. “Windows Update” .. “Change Settings” .. Ensure “Never check for updates” is selected for “Important Updates”. Ensure check boxes under “Recommeneded updates” and “Who can install updates” are also unchecked and click the “OK” button.
Setting Local Security Policy
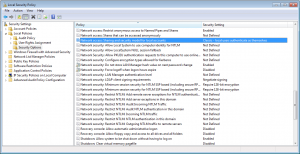
Set this Policy by going to “Control Panel” .. “Administrative Tools” .. “Local Security Policy” .. “Local Policies” .. “Security Options” .. Ensure that “Network Access: Sharing and security model for local accounts” should be set to “Classic – local users authenticate as themselves” to allow Sharing and Security to be configured.
Installing enVigil
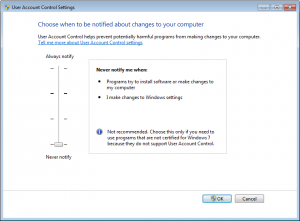
Note – It is recommended that “User Account Control” is turned off prior to the installation. If it is not switched off the enVigil installer will be unable to create the default set of local user accounts and these will have to be added manually.
You can turn off UAC at the following location “Control Panel” .. “User Accounts” .. “Change User Account Control settings” .. Move the slider down to “Never notify” and click the “OK” button. You must reboot the PC after disabling UAC for it to take effect.
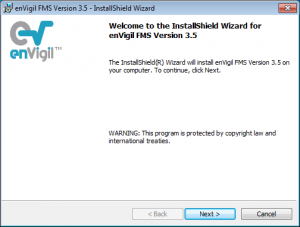
Insert the enVigil installation CD and the set-up process should autorun. If it does not, navigate to the CD drive and run the enVigil Windows installer package located there and follow the on-screen installation instructions.
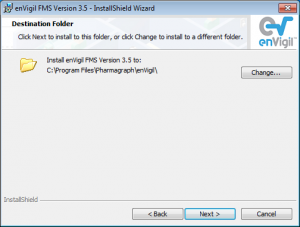
It is recommended that you accept the default installation folder of “C:\Program Files\Pharmagraph\enVigil”. If required you are able to install it in a different directory. If installing on Windows 64bit the default directory path will be “C:\Program Files (x86)\Pharmagraph\enVigil”.
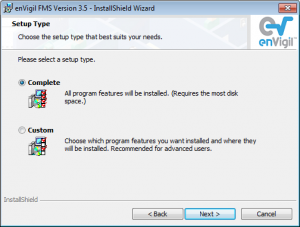
enVigil allows you to perform a “Custom” installation which allows you to specify whether to install “enVigil Client”, “enVigil Server” and “Demonstration configuration components”. For machines that will run as an enVigil server it is always recommeneded to choose the complete installation option.
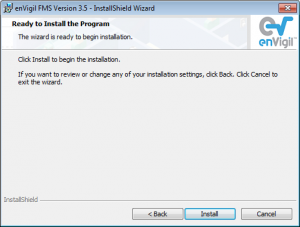
Installation is then ready to begin. Click the “Install” button to start.
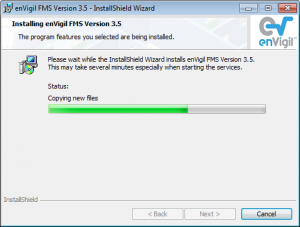
During installation a progress bar will be displayed while various tasks are being performed. Installation may take several minutes to complete.
Note – If installing with User Account Control turned on you will be prompted to authorise the installation at various times. These security prompts suspend the installation.
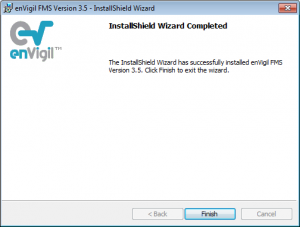
The installer should show this screen when complete. Click the “Finish” button.
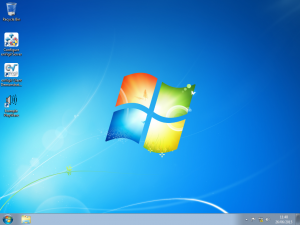
When enVigil has been installed successfully some desktop shortcuts would have been created;
“Configure enVigil Server” – Can be used to run the enVigil Server configuration program. It will only be created if the enVigil Server feature was chosen to be installed (or the “Complete” installation option was chosen).
“enVigil Client Demonstration” – Will run the enVigil Client software. If the “Demonstration Configuration” was chosen to be installed (or the “Complete” installation option was chosen) the PharmaQual enVigil Demonstration client VCX file will be run. If the demonstration configuration was not chosen to be installed then the enVigil client will run with a new (blank) screen ready for configuration. This shortcut will not be created if the enVigil Client feature was chosen to not be installed.
“Example PlayWave” – Can be configured to pla an audible alert when some system event occurs (please refer to the PlayWave manual section of the enVigil FMS System Configuration Guide).
Local User Accounts
The enVigil installation process should have created the following additional local user accounts;
“emsadmin” – Reserved administrator account for system maintainence.
“emssystem” – Reserved administrator account used to run background server processes.
“Manager” – Administrator account used to create example enVigil “Manager”. Default password is “Manager“.
“Supervisor” – Standard User account used to create example enVigil “Supervisor”. Default password is “Supervisor“.
“Operator” – Standard User account used to create example enVigil “Operator”. Default password is “Operator“.
Note – If installation was carried out while “User Account Control” was turned on the installer would have failed to create these user accounts. The “emsuser”, “emssystem” and “emsadmin” accounts should therefore be added manually.
For non-Pharmagraph systems you can reset the “emssystem” and “emsadmin” passwords. Be sure to document and safeguard the modified passwords.
Note – If you did disable “User Account Control” before installing enVigil you should now re-enable it and restart the computer.
Setting the default Password Policy
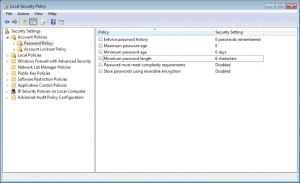
The Password Policy can be set by navigating to “Control Panel” .. “Administrative Tools” .. “Local Security Policy” .. “Account Policies” .. “Password Policy” .. Apply the following settings;
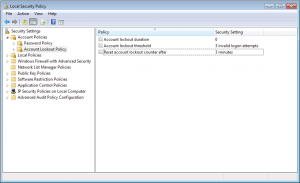
Then set the following settings in “Account Lockout Policy”;
Running enVigil Server as the “emssystem” account
Note – The enVigil Server must be run by a user with high privileges, we would normally choose the “emssystem” account to do this.
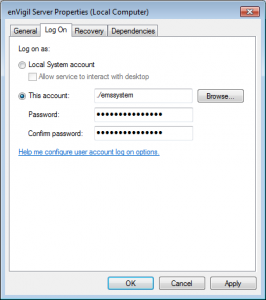
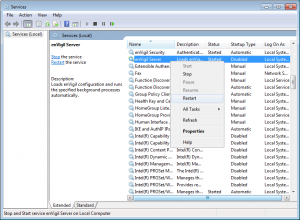
Navigate to “Control Panel” .. “Administrative Tools” .. “Services” .. “enVigil Server” .. “Properties” .. “Log On” .. Select “This account” option and type “.\emssystem” with the appropriate password.
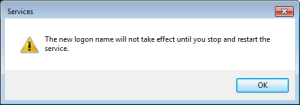
This may result in a couple of message boxes confirming this.
If the service is currently running then you may get a warning to stop and restart the service. This can be easily achieved by right clicking the service and selecting “Restart”.
Checking local accounts for password expiry
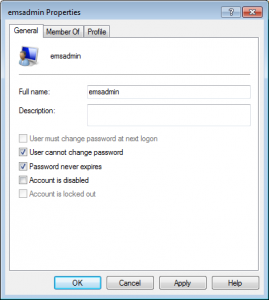
You will need to check that the “emssystem”, “emsadmin” and “emsuser” user accounts are set to never expire.
To check this type “lusrmgr.msc” into the start menus search bar. Right click each of the users listed above and select “Properties” and ensure that “User cannot change password” and “Password never expires” are checked.
Creating Task Bar Shortcuts
As “emsuser” will eventually become a low privilege account, some shortcuts should be added. You will need to pin a few items to the taskbar so that certain facilities can be run using a higher privilege account such as “emsadmin”. Three new shortcuts will provide convenient access to the “Local User Manager”, “Configure enVigil Server” (ConfServer.exe) and the “Configure enVigil Users” (ConfUserAccess.exe) program.
Note – You simply have to drag the “Configure enVigil Server” and “Configure enVigil Users” shortcuts to the taskbar to “pin” them.
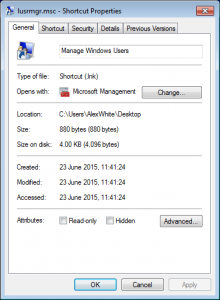
To create the “Local User Manager” shortcut navigate to the “C:\Windows\System32” folder, right click on “LUSRMGR.MSC” and select “Send to -> Desktop(create shortcut)”. Right click the resulting shortcut added to the desktop to access its properties.
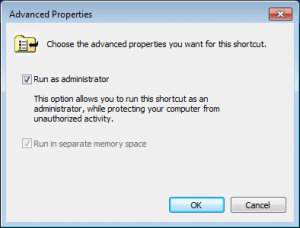
On the “General” tab set the shortcut name to be “Manage Windows Users” then move to the “Shortcut” tab and click “Advanced” – ensure that “Run as administrator” is checked and click “OK”.
Drag the shortcut to your taskbar to pin it. You can then remove the original desktop shortcut.
Sharing the Logfiles and the enVigil Configuration folder
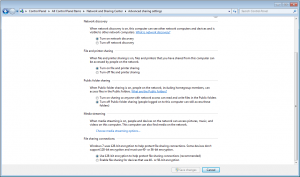
Before attempting to share either folder you must ensure that “File and printer sharing” is switched on. To check this navigate to “Control Panel” .. “Network and Sharing Center” .. “Change advanced sharing settings”. Ensure that the “Turn on file and printer sharing” option is selected and click “Save Changes”.
Navigate to the “C:\Logfiles” and “C:\enVigilConfigs\ConfigName” folder and right click and choose “Share with -> Specific people…”. Select “Everyone” from the drop down list and click the “Add” button then “Share”.
Creating Startup Shortcuts
You must create shortcuts for “AuditComment.exe” and “enVigil.exe” and copy them to emsuser’s startup directory – You can reach this by going into the “Start Menu -> All Programs -> Startup” alternatively you can browse to it.
Note – The startup directory can be found at “C:\Users\emsuser\AppData\Roaming\Microsoft\Windows\Start Menu\Programs\Startup”.
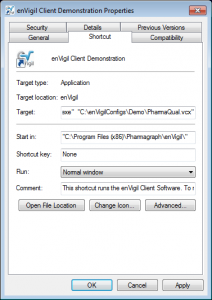
Your enVigil.exe shortcut should point to the path of your main VCX file as the second parameter.
Modifying enVigil behaviour via registry keys
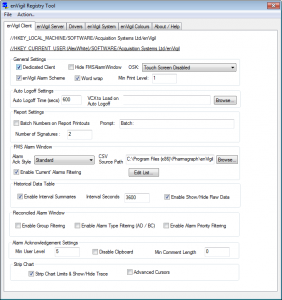
There are a number of registry keys that modify the default behaviour of enVigil. Use the enVigil Registry Tool (enVigilReg.exe) to modify these settings as required, more information can be found on each setting in the “enVigil Registry Tool” section of the enVigil FMS System Configuration Manual.
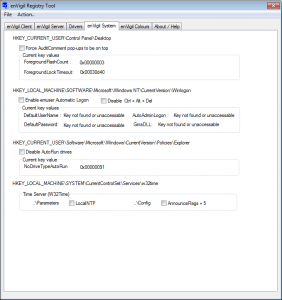
The “System” tab of the enVigil Registry tool should be used to set the registry settings shown. These settings will ensure audit comment pop-ups do not get hidden, AutoRun is disabled and the “emsuser” account will login automatically when the system starts up.
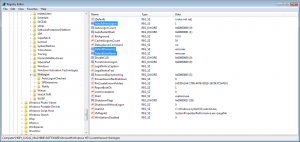
Note – If using Windows 7 64bit you must set the “DefaultUserName”, “DefaultPassword” and “AutoAdminLogon” keys manually in regedit.
If you require the machine to be a dedicated enVigil Client (e.g. enVigil is the only software used on a day to day basis) you should set the “Dedicated Client” setting on the “enVigil Client” tab. Select “Action .. Write values to registry” from the main menu to submit the changes.
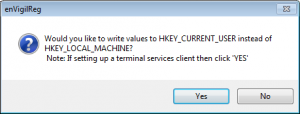
Note – When using the registry tool to change the behaviour of a terminal service client you should say “Yes” to the dialog that prompts you to change the registry keys of the HKEY_CURRENT_USER branch. You must ensure the Windows account running the terminal services session is an administrator and has not yet been demoted otherwise access to write to the registry will be denied. See Terminal Service Setup Guide for more information.
Note – Ensure “Inhibit Sleep” is set on the “enVigil Server” tab.
Disabling Ctrl+Alt+Del
Note – You can not completely disable the Ctrl+Alt+Del screen on Windows 7, but you can remove the options from it stopping people from accessing Task Manager or even shutting down the machine.
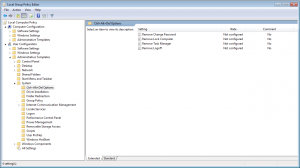
Press the start bar and type “gpedit.msc” into the start menus search bar and hit enter. Navigate to “User Configuration .. Administrative Templates .. System .. Ctrl+Alt+Del Options”. Set all items to be enabled by double clicking the item and choosing the “Enabled” option.
Remove Restart/Shutdown (Optional)
Note – This is optional as this step completely disables any ability to shutdown or restart the PC via the Windows operating system, by any user. After you apply this setting only the hardware on/off switch on the PC can be used.
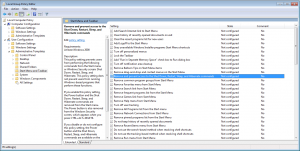
While still in gpedit.msc navigate to “User Configuration .. Administrative Templates .. Start Menu and Taskbar Options”. Set the “Remove and prevent access to the Shut Down, Restart, Sleep and Hibernate commands” to “Enabled”.
Setting ownership permissions for the enVigil install, logfile and configuration directories
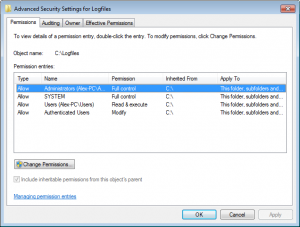
Navigate to the enVigil install directory, the logfile directory (C:\Logfiles) and the configuration directory (C:\enVigilConfigs\ConfigName) and in turn, right click each folder to access its properties.
Select the “Security” tab and click the “Advanced” button.
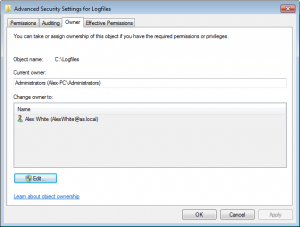
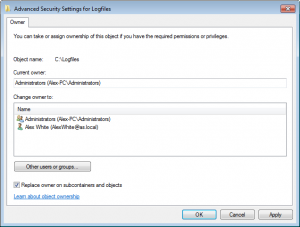
Select the “Owner” tab, if the current owner is listed as “emsuser” follow the remaining steps to change the owner.
From the “Owner” tab click the “Edit” button and ensure that the check box “Replace owner on subcontainers and objects” is checked.
Click the “Administrator” user from the “Change owner to” list and click the “Apply” button. Click “OK” on the three currently open permission dialog boxes.
Demoting emsuser to a limited user
Before completing the set up you must demote the “emsuser” user account to a limited user. If this step is not completed then “emsuser” will be able to edit/remove files that it should not be able to.
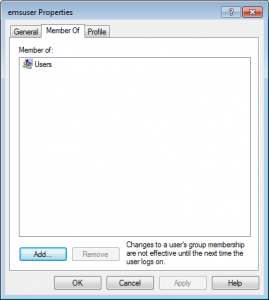
Type “lusrmgr.msc” into the start menus search bar and press enter, then navigate into the “Users” folder. Right click “emsuser” and select “Properties .. Member Of” and remove the “Administrators” group entry.
Note – This guide is for a standalone system on a WORKGROUP network, domain based systems will be slightly different to set up and you should refer to our Workstation Configuration Guide for more information.

