Introduction
This guide will go through all of the necessary steps you should take while configuring a brand new stand-alone PC with enVigil FMS. In this guide we will be using enVigil FMS 4.0 build 2, but this should be similar for past and future versions. It concentrates on computers running Windows 10 Professional.
Additional steps are required when implementing an enVigil view node system and covered in a separate document “Terminal Services Configuration Guide” which addresses both the changes needed on the enVigil Server PC and the setup instructions on the remote client.
For computers intended to run as a part of a domain you should be aware that any configuration changes made prior to joining the computer to the domain may be reset by the domains group policy. Therefore you should always check each step of this document after the computer has been joined to the domain.
PC Prerequisites
Computer specifications vary between projects, however several requirements are common and for this guide we recommend the below:
- The host OS should be Windows 10 Pro 64bit
- Minimum of a dual-core processor | 2GB RAM | 500GB HDD
- RAID 1 is recommended
Windows Install
Windows 10
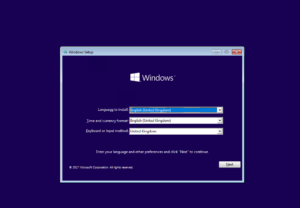
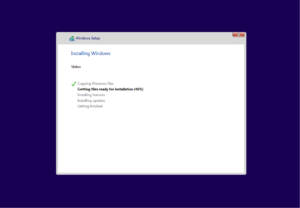
When setting up a new system for Windows 10, you will be greeted with a similar screen to the below. When installing Windows 10, most of the default options can be accepted without editing anything – there are only a few that should be changed which are shown below.
One of the first screens that will appear is requesting for a serial key. This can either be typed in if you have it to hand, or entered later by selecting “I don’t have a product key”.
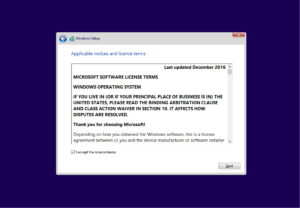
Accept all of the licence agreements that are shown.
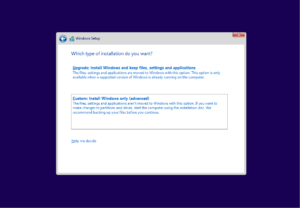
When given the option of the install type, choose “Custom: Install Windows only (advanced)”.
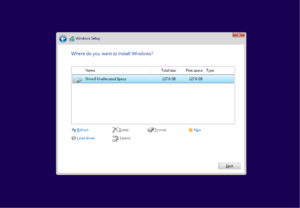
You should be shown a screen with an available disk as below, select it and choose “Next”.
Windows 10 will now start to install and this can take a little while to complete.
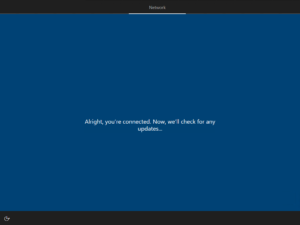
Once installed, Windows will ask for your keyboard layout and then will continue to install some updates automatically if on a network.
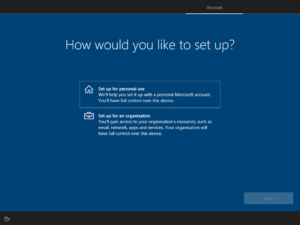
It will then ask what type of account you would like to set up, one for personal use or for an organisation. As we are setting up a stand-alone PC, you should select for personal use.
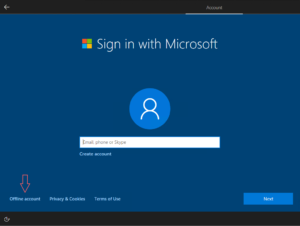
Windows will then offer you to login to a Microsoft account to continue, but for this we would prefer a local account. Choose the “Offline account” option from the bottom-left.
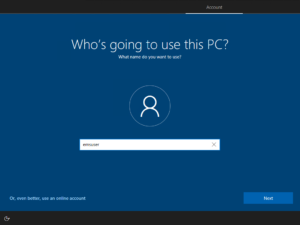
The next couple of screens are setting up the username and password. The first user you create should be called “emsuser” with the password as the same if this will be a stand-alone enVigil Server PC.
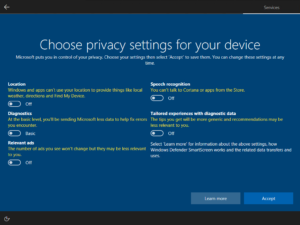
The last couple of screens are about privacy settings and using the Windows helper “Cortana”. You should select “No” to Cortana and remove all of the sharing information as below.
PC Configuration
Setting up the Control Panel
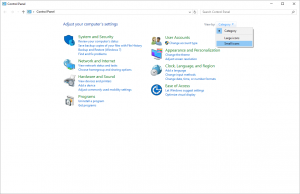
Open up the control panel by right-clicking the Windows Start button then select “Control Panel”. Ensure that “View by” is set to “Small icons”.
Removing unwanted applications
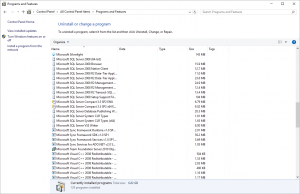
It is advised to remove undesirable applications from the PC before moving on. Applicationss relating to trial versions of anti-virus and built-in applications such as Dell/HP/Toshiba software should be removed (e.g. Dell OMCI and Dell Backup must be removed). Use the Windows Control Panel .. Programs and Features to locate and uninstall these programs.
It is sometimes difficult to define the unwanted applications on a PC as the installed software is likely to change frequently. You should make a valued judgement as to whether the software is really needed. If you have any concerns or questions about a specific bit of software you should consult your IT department.
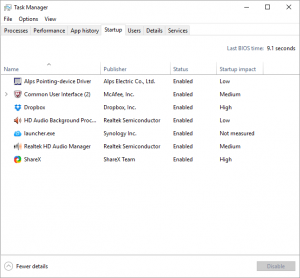
Ensure that any unwanted entries are also removed from the system startup. In Windows 10 the system startup list has moved into the same window as Task Manager – you can reach this by either pressing Ctrl+Alt+Delete and choose “Task Manager” or by right-clicking your taskbar and choosing it there. Once opened, select the “Startup” tab and disable any unused applications by right-clicking and choosing “Disable”.
Setting the resolution and screen saver
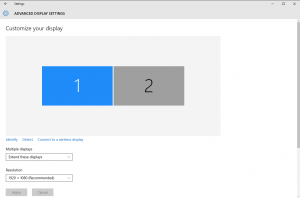
Right click the Desktop and select “Display settings” – from there scroll to the bottom and choose “Advanced display settings”. Ensure the resolution is set to at least 1280 x 1024.
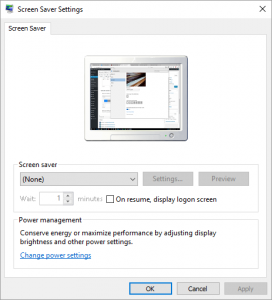
Right click the Desktop again and choose “Personalize” and choose from the menu on the left “Lock Screen”. Select “Screen saver settings”, ensure that it is set to “(None)” and then check that the “On resume, display logon screen” is unchecked – then click “OK”.
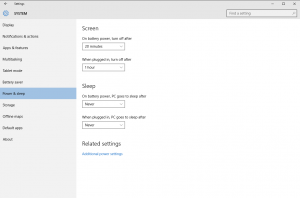
While still in the “Personalize” screen, choose the link “Screen timeout settings” and ensure that the PC will never sleep by setting the “Sleep” settings to “Never”.
Setting up the Windows Login screen
Run the “Local Group Policy Editor” by typing “gpedit.msc” in the start menu search bar. Under “Local Policy” .. “Computer Configuration” .. “Administrative Templates” .. “System” .. “Logon” – Ensure “Hide entry points for Fast User Switching” setting is enabled.
Enabling the Administrator user
By default the built-in Administrator user is disabled after Windows installation. It should be enabled and set up with a suitably secure password.
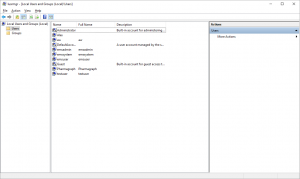
To enable the user you must navigate to the Windows local user manager – to do this, right-click the start button and select “Computer Management”, from there select “Local Users and Groups” from the menu on the left and go inside the “Users” folder. It should look similar to the below.
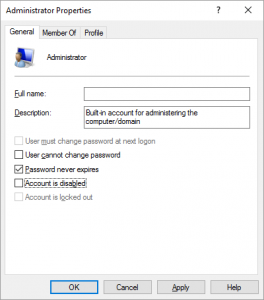
Right click the “Administrator” user and choose “Properties”. Ensure that “Account is disabled” is unchecked as below.
Once enabled, you can set the password by right-clicking again and choosing the “Set Password…” option.
Disabling the Windows Firewall
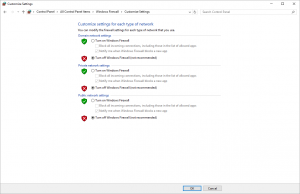
Disable the Windows Firewall by right-clicking the Start button and choosing “Control Panel” .. “Windows Firewall” .. Click “Turn Windows Firewall on or off” and choose “Turn off Windows Firewall” under each location.
![]()
Turning the Windows Firewall off is only recommended if the system is not on a domain/network and does not have internet access.
Disabling Security Alerts
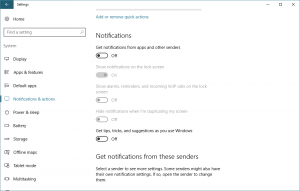
Disable Security Alerts by clicking on the Windows Start button and choosing the “Settings” option which is the cog icon then choose “System”. From there click “Notifications and actions” from the menu and toggle “Get notifications from apps and other senders” to off. You should also disable “Get tips, tricks, and suggestions as you use Windows”.
Disabling Automatic Windows Updates
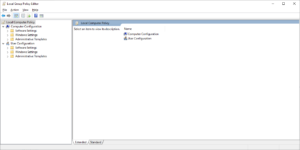
Disabling Automatic Windows Updates in Windows 10 is a longer process than in Windows 7 previously. There is not an obvious place where this can be disabled. To do this on Windows 10, you must start by clicking on the Windows Start button and typing “gpedit.msc” – click on the result to open the Group Policy editor. There should be a window as below;
Navigate to “Computer Configuration” .. “Administrative Templates” .. “Windows Components” .. “Windows Update”. Double click on the option “Configure Automatic Updates” and select the “Disabled” check box on the resulting page. This will stop Windows from downloading updates automatically and restarting the computer. If the computer is on a network/domain, these updates can be searched for manually – or they can be arranged by the IT department and the corresponding site.
Setting Local Security Policy
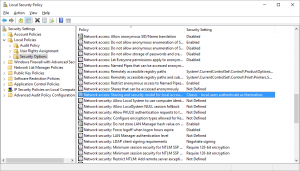
Set this policy by first right-clicking on the Windows Start button and choosing “Control Panel” .. “Administrative Tools” .. “Local Security Policy”. Then browse into “Local Policies” .. “Security Options” and ensure that “Network Access: Sharing and security model for local accounts” is set to “Classic – local users authenticate as themselves” to allow Sharing and Security to be configured.
Installing enVigil
![]() It is recommended that “User Account Control” is turned off prior to the installation. If it is not switched off before the install, enVigil will be unable to create the default set of local user accounts and these will have to be added manually after the install.
It is recommended that “User Account Control” is turned off prior to the installation. If it is not switched off before the install, enVigil will be unable to create the default set of local user accounts and these will have to be added manually after the install.
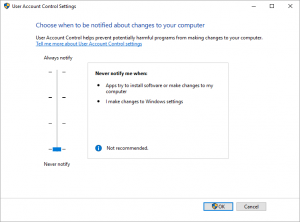
You can turn off UAC by right clicking the Windows Start button and choosing “User Accounts” .. “Change User Account Control settings”. Move the slider down to “Never notify” and click the OK button. There is no longer a need for a reboot after updating UAC settings on Windows 10 – any previous version of Windows will need a reboot.
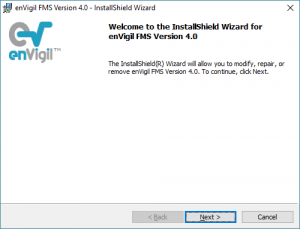
Insert the enVigil installation CD and the setup process should autorun. If it does not, navigate to the CD drive and run the enVigil installer package located there and follow the on-screen installation instructions.
It is recommended that you accept the default installation location of “C:\Program Files\Pharmagraph\enVigil”, although if required you are able to install it in a different directory. If you are installing onto a 64 bit version of Windows 10, the installation path will be “C:\Program Files (x86)\Pharmagraph\enVigil”.
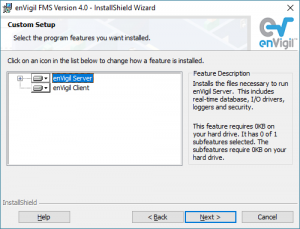
enVigil allows you to perform a “Custom” installation which allows you to specify whether to install “enVigil Client”, “enVigil Server” and “Demonstration configuration components”
When enVigil has been installed successfully some desktop shortcuts would have been created;
“Configure enVigil Server” – Can be used to run the enVigil Server configuration program. It will only be created if the enVigil Server feature was chosen to be installed (or the “Complete” installation option was chosen).
“enVigil Client Demonstration” – Will run the enVigil Client software. If the “Demonstration Configuration” was chosen to be installed (or the “Complete” installation option was chosen) the PharmaQual enVigil Demonstration client VCX file will be run. If the demonstration configuration was not chosen to be installed then the enVigil client will run with a new (blank) screen ready for configuration. This shortcut will not be created if the enVigil Client feature was chosen to not be installed.
“Example PlayWave” – Can be configured to play an audible alert when some system event occurs (please refer to the PlayWave manual section of the enVigil FMS System Configuration Guide).
Local User Accounts
The enVigil installation process should have created the following additional local user accounts;

Newer versions of Windows 10 no longer create the additional user accounts for enVigil due to security. These accounts will need to be created manually through Windows user account manager.
Secure passwords will need to be set for both “emsadmin” and “emssystem” when created manually.
Setting the default Password Policy
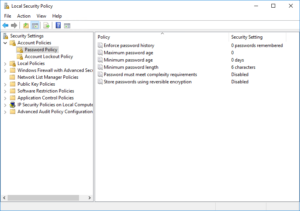
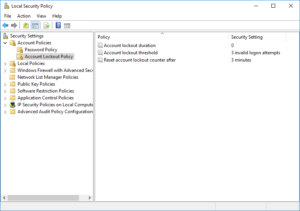
To set the default password and lockout policy on Windows 10, you must navigate to;
“Control Panel” .. “Administrative Tools” .. “Local Security Policy” .. “Security Settings” .. “Account Policies” .. “Password Policy” / “Account Lockout Policy” – apply the settings below;
Running the enVigil Server service as the “emssystem” account
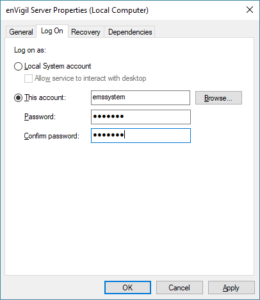
The enVigil Server service within Windows should be run as the “emssystem” account who should be a local Administrator. To set this up you must go to;
“Control Panel” .. “Administrative Tools” .. “Services” – Right-click the service named “enVigil Server” and select properties and then the “Log On” tab, this should be set up as below;
After selecting “Apply” you will be given a couple of messages explaining that it will not take effect until after a services restart. To do this, you can right-click the service and choose “Restart”.
Creating Task Bar shortcuts
Task bar shortcuts within Windows 10 work the same way in Windows 7. To create a shortcut to a program you just have to drag the shortcut icon from your desktop onto the task bar and release to create the link.
Sharing the “Logfiles” and “Configuration” folder
Sharing the Logfiles and Configuration folder should be done when using DCOM clients, this will not be needed when using Terminal Services.
Navigate to the “C:\Logfiles” and “C:\enVigilConfigs\ConfigName” folder and right-click it and choose “Give access to” > “Specific people…” then select “Everyone” for “Read” access and click the “Add” button.
Creating Startup shortcuts
Shortcuts must be created for the enVigil client and AuditComment to run at startup of the server machine. You can create a shortcut to AuditComment.exe from your “Program Files\Pharmagraph\enVigil” folder and you can place your main VCX file within the startup directory alongside it.
The startup path can be found at: “C:\Users\emsuser\AppData\Roaming\Microsoft\Windows\Start Menu\Programs\Startup”.
Modifying enVigil’s behaviour via registry keys
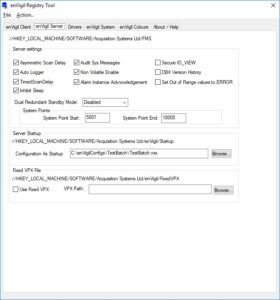
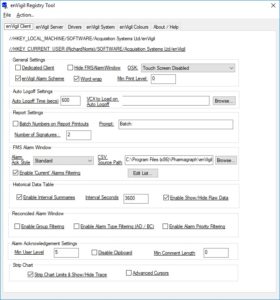
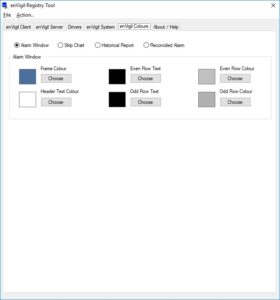
There are a number of registry keys that can modify the default behaviour of enVigil. You can use the enVigil Registry Tool (enVigilReg.exe) to modify these settings as require. More information can be found on each setting in the “enVigil Registry Tool” section of the enVigil FMS System Configuration Manual.
If you require the machine to be a dedicated enVigil Client (e.g. enVigil is the only software used on a day to day basis) you should set the ‘Dedicated Client’ setting on the ‘enVigil Client’ tab Select Action->’Write values to registry’ from the main menu to submit the changes.
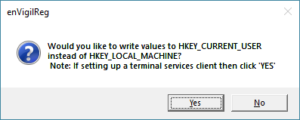
When using the registry tool to change the behaviour of a terminal service client you should say ‘Yes’ to the dialog that prompts to change the registry keys of the HKEY_CURRENT_USER branch. You must ensure that the Windows account running the terminal services session is an administrator and has not yet been demoted otherwise access to write to the registry will be denied. See ‘Appendix C -Terminal Service Setup Guide’ for more information.
Disabling Ctrl+Alt+Del Options
Press the “Windows key + R” to launch the Windows run dialog and type in “gpedit.msc” and click “OK”.
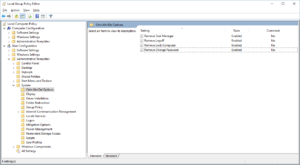
Navigate to “User Configuration” .. “Administrative Templates” .. “System” .. “Ctrl+Alt+Del Options” and set all of the available options to “Enabled”.
Navigate to the ‘Start Menu and Taskbar Options’ folder “User Configuration” .. “Administrative Templates”. Set the ‘Remove and prevent access to the Shut Down, Restart, Sleep, and Hibernate commands’ to ‘Enabled’. Note: This completely disables any ability to shutdown or restart the PC via the Windows operating system, by any user. After this setting has been applied only the hardware on/off button on PC can be used. This setting is optional.
Collection File (.CLX) Permissions
If your enVigil configuration requires that the user can modify any Collections (e.g. they can modify the Collection of points used by LB2 Convert GRX facility) you must ensure that the file permissions for the .CLX file are set such that the emsuser account has “Write” permissions.
- Right-click the .CLX file and select “Properties”
- “Security” .. “Edit” .. “Add” .. type “emsuser” .. “Check Names” .. “OK”
- With “emsuser” selected, ensure the “Allow” permissions are all set except for the “Full Control” entry and then select “OK”.
Demoting “emsuser” to a limited user
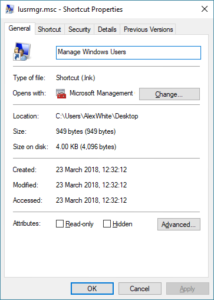
Once the setup of this enVigil PC has been completed, “emsuser” should be demoted to a “Standard” user within Windows. To do this you can run the “Local Users Manager” (shortcut created earlier) and go into the “Users” folder. Right-click the “emsuser” user and select “Properties” – select the “Member Of” tab and ensure you remove the “Administrators” group.
![]()
Ensure you have another Administrator-level account that can be accessed if anything needs to be changed in the future.

